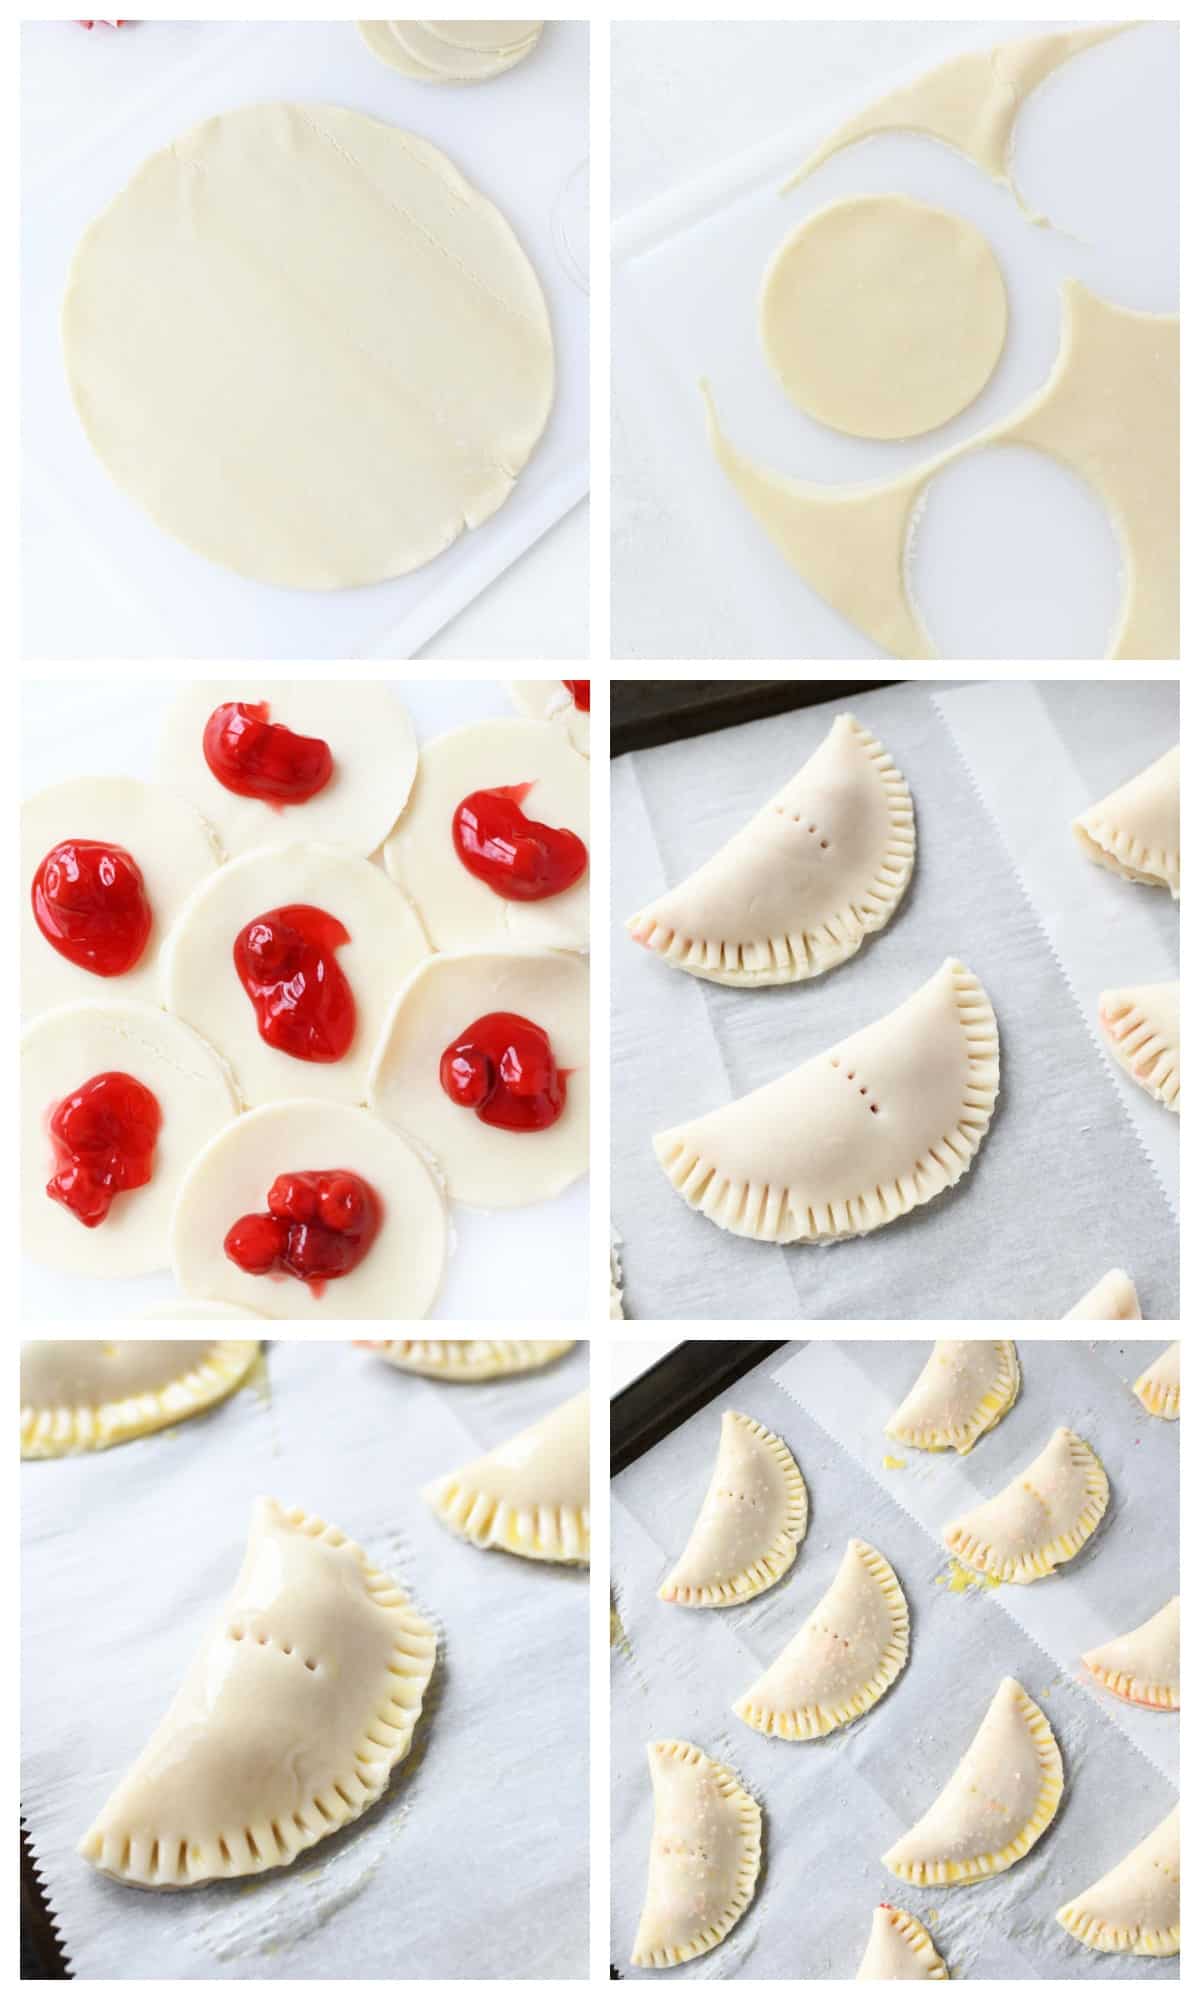
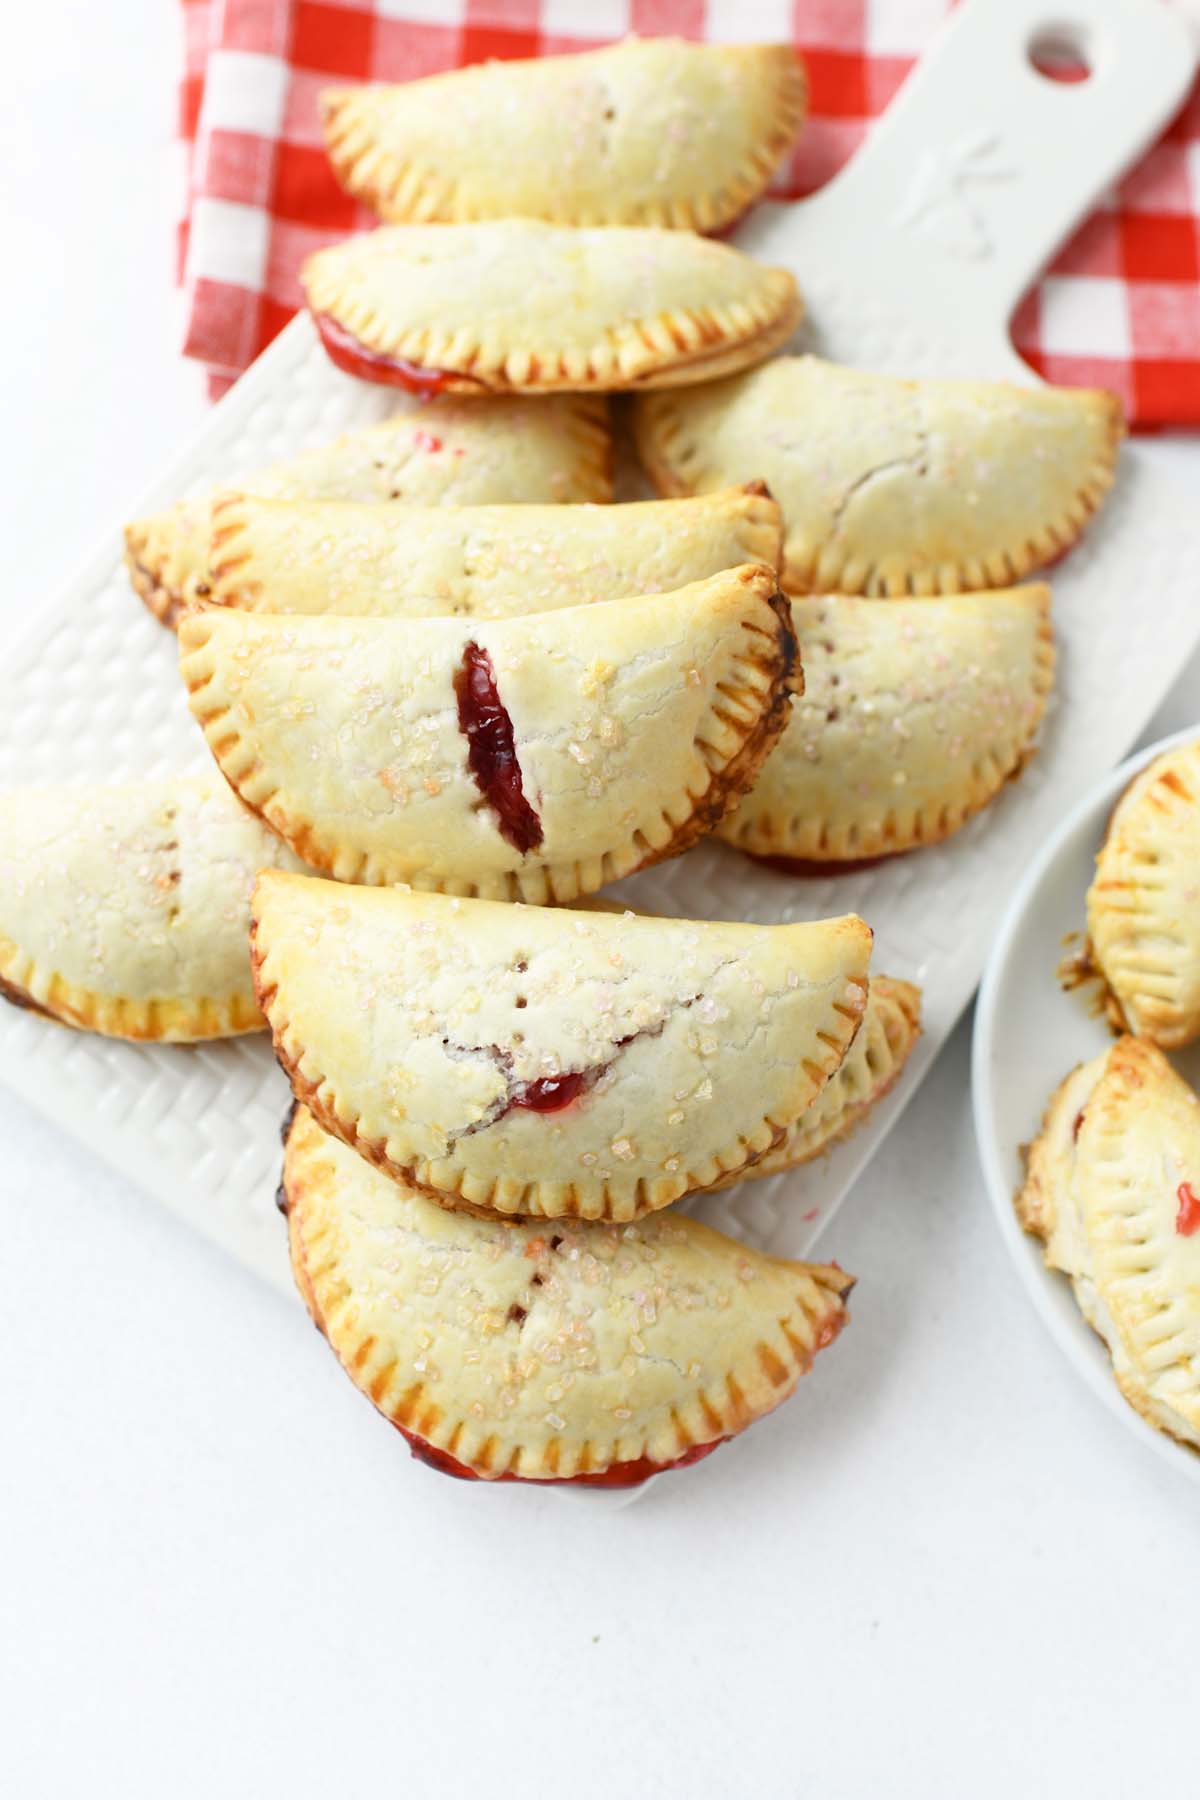
In this post, we’ll show you how to make these easy and delicious Easy Cherry Hand Pies.
Do you have a favorite pie that you always crave? Maybe apple, pumpkin, or cherry? For me, it’s cherry! I love the sweet flavor and the beautiful color. But sometimes there’s just not enough time to make a pie crust from scratch for an upcoming get-together, holiday, or craving!

What if I told you that today we are going to be making delicious Cherry Hand Pies – without any of the fuss of traditional pies? You’re going to love these easy-to-make hand pies because they’re made with store-bought refrigerated pie dough and canned cherries so there is no need for a ton of kitchen tools, or even dirtying up your kitchen much!
Let’s explore how easy these little crescent moon-shaped hand pies are to put together for around $5!!!
Cherry Hand Pies desserts are sprinkled with sanding sugar and easy to make. Canned or homemade cherry pie filling is nestled in-between flaky pie crust and baked to golden-brown perfection. This recipe is quick to make with only a few ingredients like Pillsbury Refrigerated Pie crust.
This recipe will leave your taste buds tingling as you take a bite into the flaky pie crust. The filling is so sweet and tart with just enough lemon to satisfy any craving for fresh fruit desserts!
The best part of these hand pies is that you can use your favorite homemade pie crust recipe or store-bought refrigerated pie crust. The magic happens with this easy-to-follow technique. If you love those glazed gas station pies, these will blow those away! We also have Blueberry Lemon Hand Pies, Peach Hand Pies, and Lemon Hand Pies recipes to try out!

Ingredients
In order to make Cherry Hand Pies, you’ll need the following ingredients:
- Pie Crust or Dough – While I do love my lard pie crust dough recipe, I opted for ease with this pie recipe. Using store-bought refrigerated pie crust made things quicker and easier. One box of two crusts will yield 12 hand pies.
- Cherry Pie Filling – You can absolutely use any fresh or canned pie filling like fresh blueberry compote, or use canned which works well!
- Egg – This is used to help the pies achieve a nice golden crust. You only need a little to get that perfect texture and color.
- Sugar – We used pink sanding sugar for these. However, you can use any coarse sugar you might have on hand.

Equipment and Supplies Needed
We used the following equipment and supplies to make this recipe. Items that are optional or can be substituted will be noted.
- Large baking sheet – These pies do need really spread, but will puff up a bit. You will be able to bake them all on one large baking sheet.
- Rolling pin – You will have pie scraps leftover that will need to be rolled out to cut out more crusts.
- Spoon – to add one tablespoon of filling to each crust.
- 4″ diameter cutter, bowl, or mug – This will help you to cut out the circle that makes up the hand pie crust.
- Pastry brush – used to brush the egg whites onto the pies.
- Small bowl – to hold the egg.
Recipe Tips
This recipe is easy to make if you know the right tips and tricks! Here are my tips for ensuring your Cherry Hand Pies come out perfectly.
Pie Crust Dough Temperature
Dough temperature is important. If you are working with refrigerated pie crust I suggest allowing it to sit out for 15 minutes before working with it. I have found that unraveling cold, rolled pie crust sheets often ends with the crust cracking or breaking apart.
Wait for your pie crust dough to warm up close to room temperature. As a result, it will unroll easier and should not break apart.
Filling Tips
It is very important that your cherry pie filling is chilled or even slightly frozen. This will help the berry filling from oozing out of the pies. Some might still leak but this small step helps.
Another thing to avoid is adding too much filling to each pie. You want to use exactly one tablespoon of chilled filling to the very center of each pie crust circle. This will help you to keep the filling inside the crimped pie.

Storage
If you want to store your Cherry Hand Pies after baking or freeze them for future baking, just follow these easy steps.

Room Temperature Storage
Baked Hand pies are best when eaten on the same day. However, they do last up to 24 hours in an air-tight container.
Note: Pies should be fully cooled before adding them to a storage container, or they will get mushy.

Freezer Storage
To freeze hand pies before baking:
- Assemble them, but do not egg wash them.
- Add them to a wax paper-lined baking sheet.
- Place baking sheet in the freezer and freeze unbaked pies for 4-6 hours or until completely frozen.
- Individually wrap each pie with plastic wrap and store it in an airtight container so they do not get crushed.
To bake from frozen:
- Remove from the freezer.
- Egg wash the frozen pies, and
- Bake according to the recipe below, but add an additional 2 minutes to the baking time.
To freeze baked pies:
- Bake the pies as directed, but do not add the sugar.
- Allow the pies to cool to room temperature.
- Individually wrap each pie with plastic wrap and store it in an airtight container so they do not get crushed.
To defrost frozen baked pies:
- Remove from freezer.
- Allow pies to thaw fully at room temperature.
- Pat them dry and heat in the microwave or oven for a minute or two at 350 degrees F.
Recipe
Follow the recipe below to make Cherry Hand Pies! This recipe makes 14 pies, but you can adjust the recipe card for other serving sizes.

If you love this recipe that uses cherry, you might also like this Cherry Angel Food Cake recipe.
Easy Cherry Hand Pies
Equipment
- Large Baking Sheet
- parchment paper
- Rolling Pin
- 4" biscuit cutter or bowl rim
- tablespoon
- oven
- Pastry brush
- fork
- small bowl
Ingredients
- 14.1 ounces pie crust store-bought
- 14 tablespoons cherry pie filling chilled
- 1 large egg whisked until light and fluffy
- 1 tablespoon coarse sanding sugar
Instructions
- Preheat oven to 375°F. Line a large baking sheet with parchment paper.
- Cut 4" diameter pie crust circles. Roll out any dough scraps to make additional circles.
- Add one tablespoon of cherry pie filling to the center of each pie crust. Fold over the pie crust and gently pinch the edges of the pie ends to seal the pies and use a fork to crimp.
- Brush each pie with the egg white using your pastry brush. Add a pinch of sugar to each.
- Bake pies on the center oven rack for 15 minutes. They will be golden brown, and firm to the touch.
- Allow pies to cool for 15 minutes before enjoying.


Egg white! Enjoy!
Your recipe states egg beaten until fluffy, however, in the directions you state egg white. Which is it<